If a picture is worth a thousand words, then a video is worth ten thousand. Whether you're showing someone how to perform a software task such as changing your browser home page or you want to capture an impressive gaming session, screen recording in Windows is the way to do it. You can even screen record live video from streaming services or online meetings, though you should make always sure you he permission to do so.
Windows 11 and Windows 10 both he screen recording capability built-in as part of the Xbox Game Bar tool, but it has some limitations, including the fact that it can only screen record one app at a time and not the whole desktop. If you he Windows 11, the Snipping Tool has screen recording and allows you to choose a specific region of the desktop, but it's not a perfect solution. You may also prefer to use a more robust, third-party app such as OBS or ShareX, both of which are free.
You may like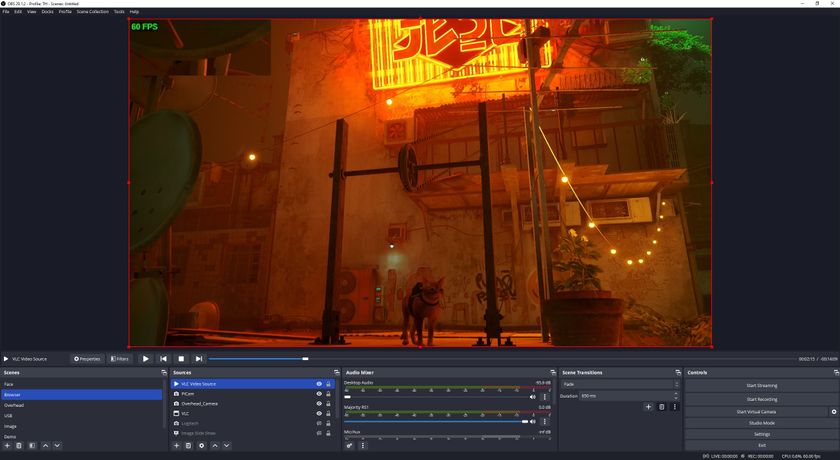 How To Crop and Zoom in OBS — Get to the heart of the action!
 How to get Windows 11 for free (or less than $15) — Get the latest Microsoft OS for less than the price of Windows 10's ESU
 How to upgrade to Windows 11 — make your update as painless as possible now windows 10 support has ended
Record the Windows Screen with Xbox Game Bar
How to upgrade to Windows 11 — make your update as painless as possible now windows 10 support has ended
Record the Windows Screen with Xbox Game BarBuilt into both Windows 11 and Windows 10, the Xbox Game Bar has a number of features, including CPU and GPU monitoring. However, its most useful feature is its ability to screen record in Windows, outputting to MP4 format.
XBox Game Bar works as well in other applications such as Chrome as it does in Games, but it only works within a single application at a time and cannot capture the Windows desktop or File Explorer.
So, if you want to show someone how to do a task involving multiple programs -- for example, programming a web page in a code editor and then viewing it in a browser -- you would need to grab multiple videos. And if you want to show them how to do anything in the Windows 11 or 10 UI, such as using the Start menu, you can't. For those activities, you should use another tool such as OBS, which we'll show you how to screen record with later in this article.
1. Click into the app you wish to record.
Stay On the Cutting Edge: Get the Tom's Hardware NewsletterGet Tom's Hardware's best news and in-depth reviews, straight to your inbox.
By submitting your information you agree to the Terms & Conditions and Privacy Policy and are aged 16 or over.2. Hit the Windows Key + Alt + R to start screen recording. A small recording widget showing how long you've been recording appears somewhere on the screen, most likely in a corner. You can also get here by launching the Xbox Gamebar (Windows Key + G) and then finding the capture widget, but the keyboard shortcut is much simpler.
3. Perform whatever actions you want and use your microphone to record audio. You can also mute the mic if you don't want to capture any sound.
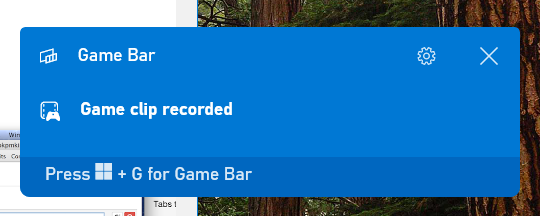
4. Hit the Windows Key + Alt + R again to stop screen recording. You can also hit the stop button on the widget You will get an alert that says "Game clip recorded. If you click on it, you will go into the Gallery section of the Gamebar app and be able to preview the video you captured. You can also find the MP4 file you recorded under your Videos/Captures folder.
You may like
How To Crop and Zoom in OBS — Get to the heart of the action!
How to get Windows 11 for free (or less than $15) — Get the latest Microsoft OS for less than the price of Windows 10's ESU
How to upgrade to Windows 11 — make your update as painless as possible now windows 10 support has ended
While the default settings are probably fine for most people, there are a few options you can change.
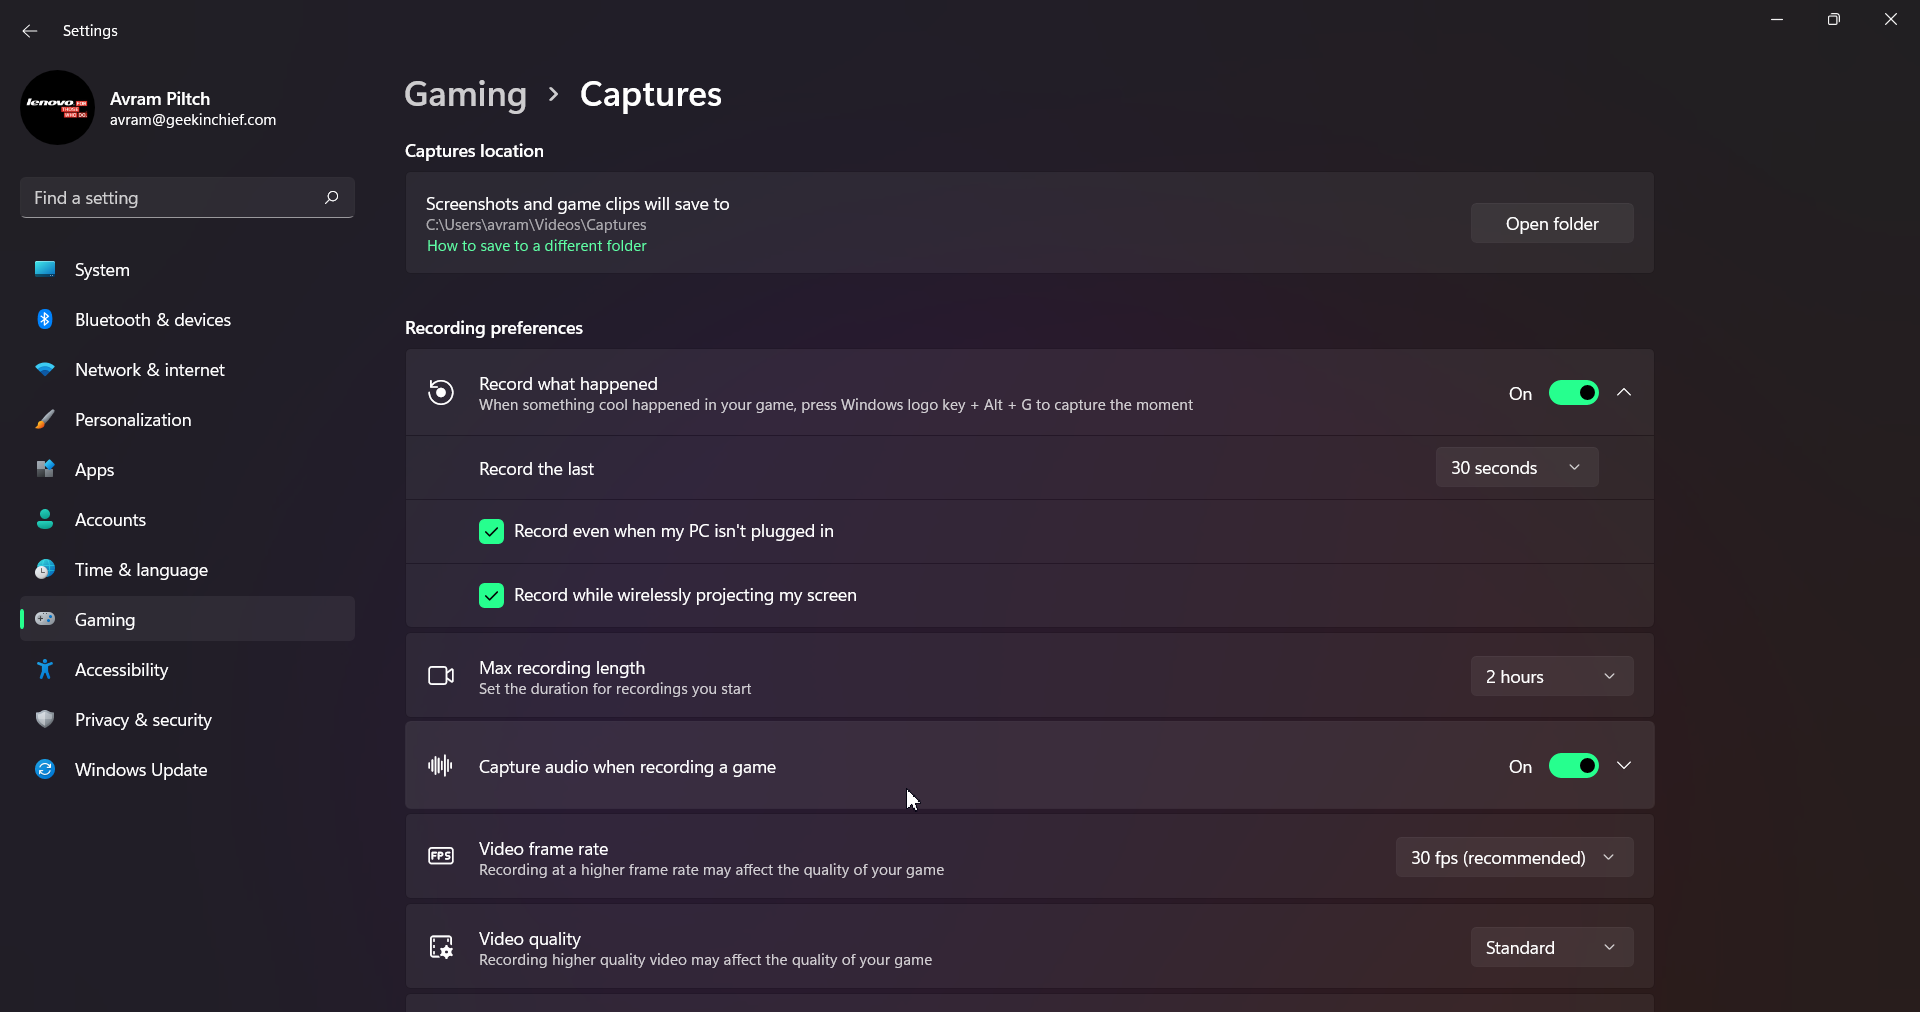
1. Nigate to Settings->Gaming->Captures.
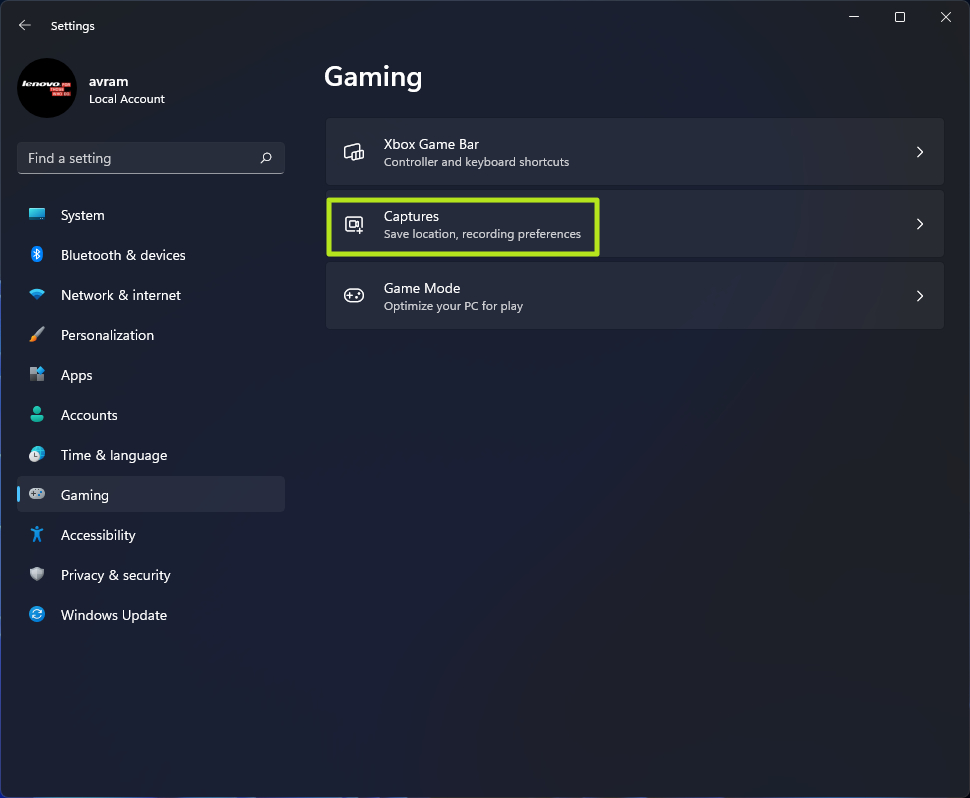
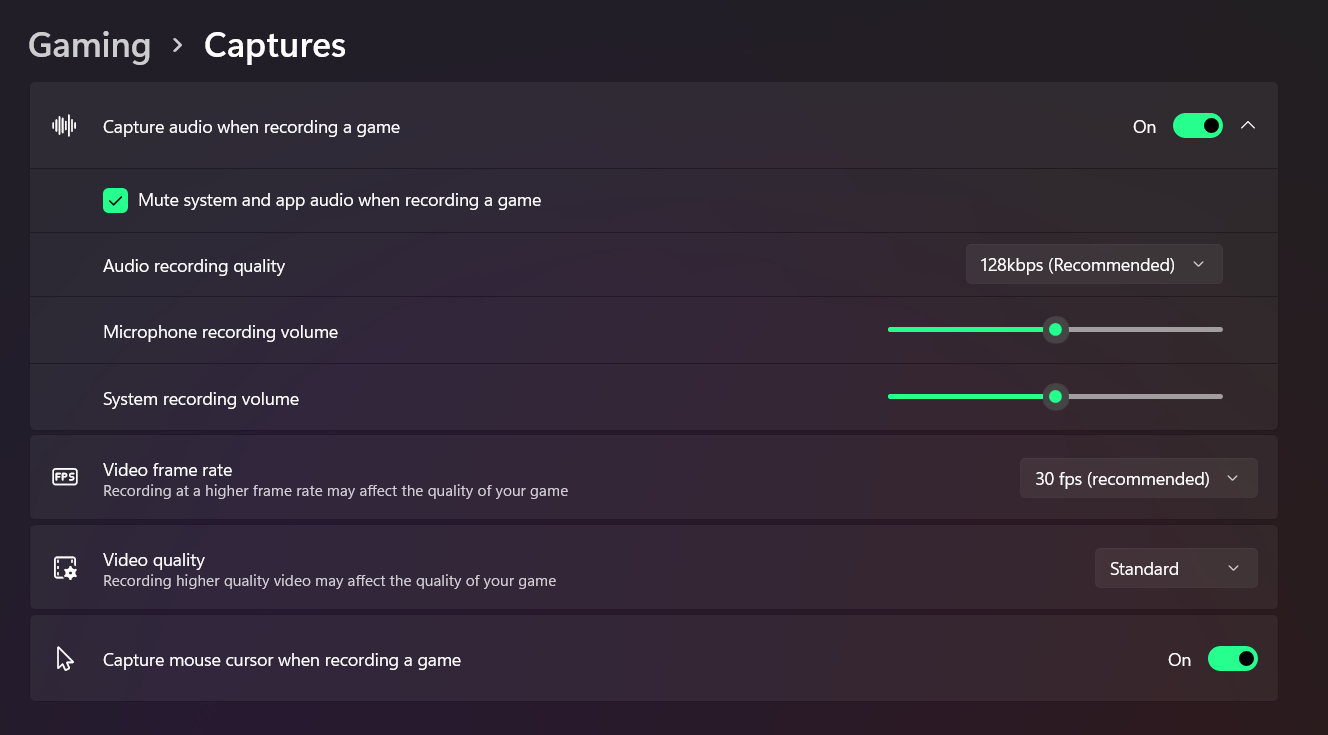
2. Change any of the following settings. Note that though they use the word "game," the settings should apply to any app you record whether it's a game or not.
Record what happened (Win 11) / Background Recording (Win 10): this creates a 30-second (or greater if you change the settings) buffer of automatically recorded content. So if you are playing a game and just had an epic kill, you can hit Windows key + G to launch game bar and you can se the 30 seconds that just passed, even though you weren't actively screen recording it. Note that the name of this setting is different in Windows 11 than 10, but the feature is the same.
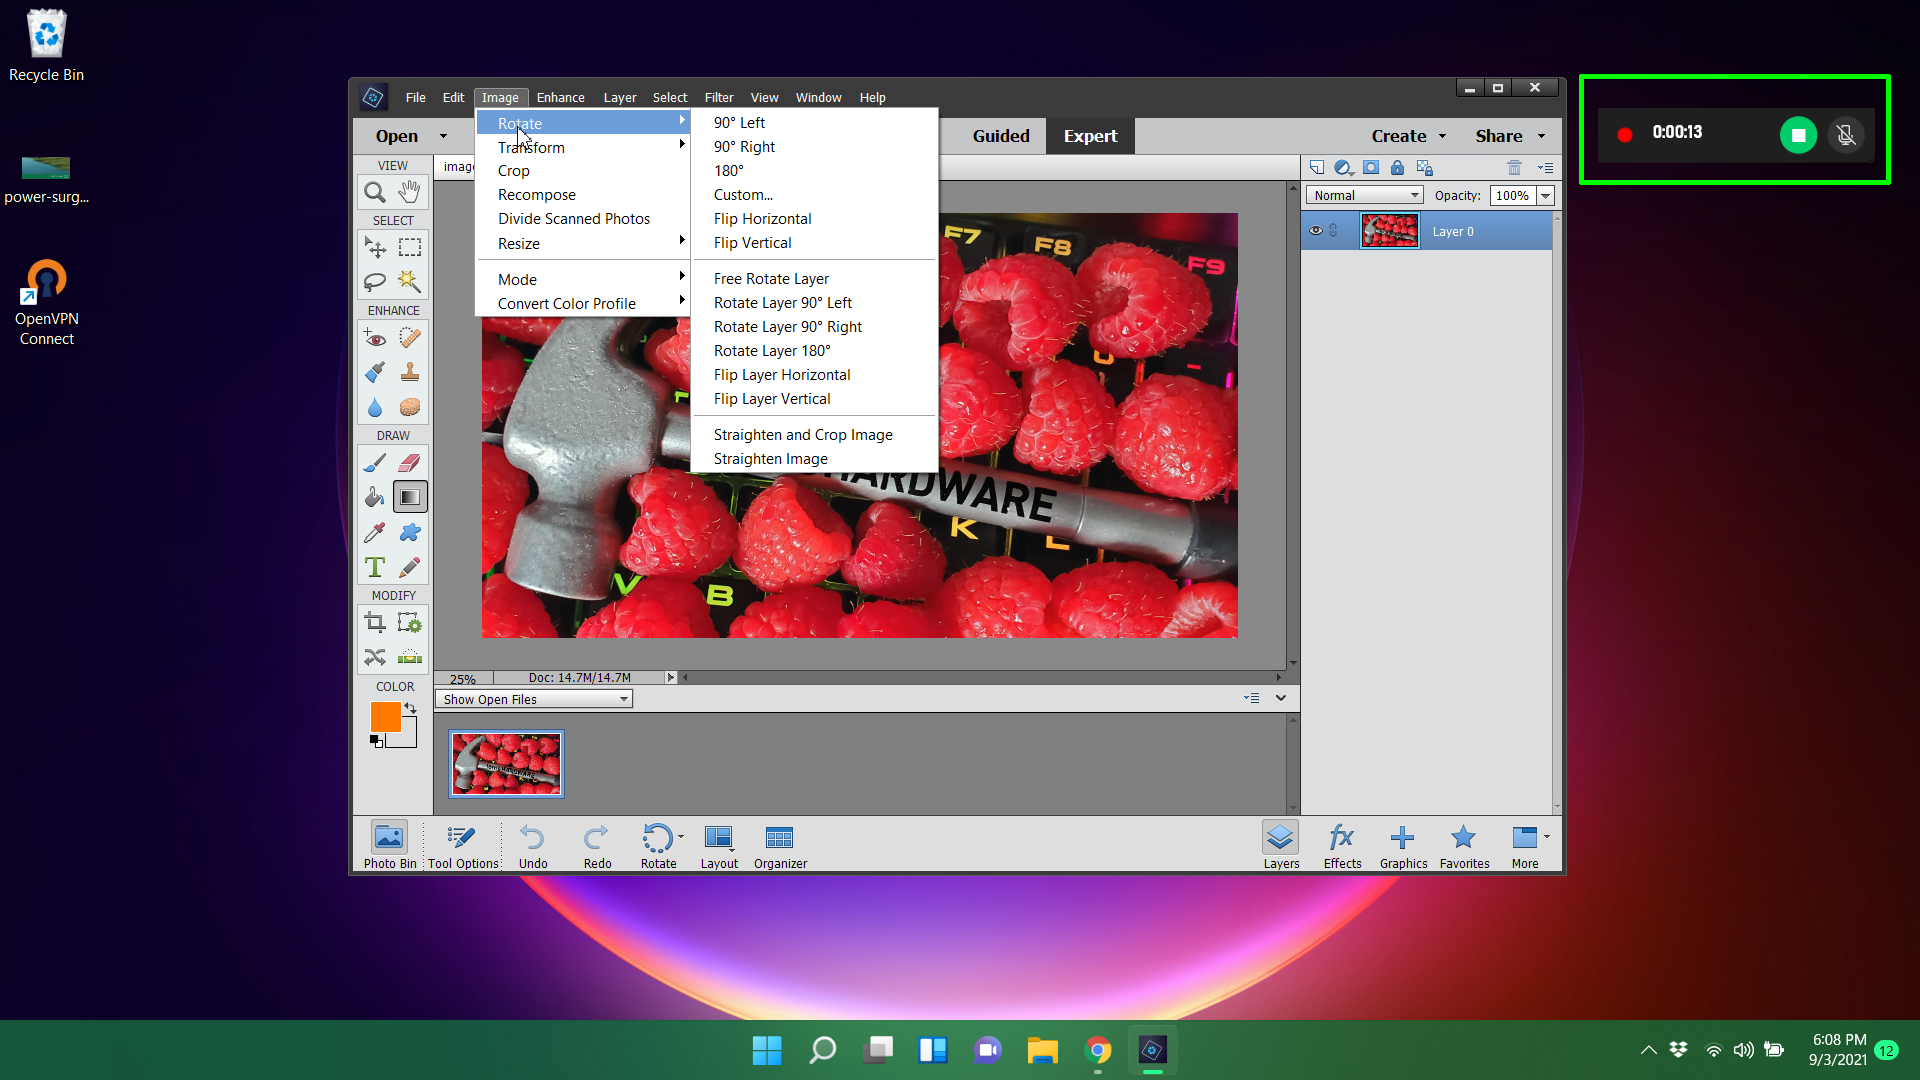
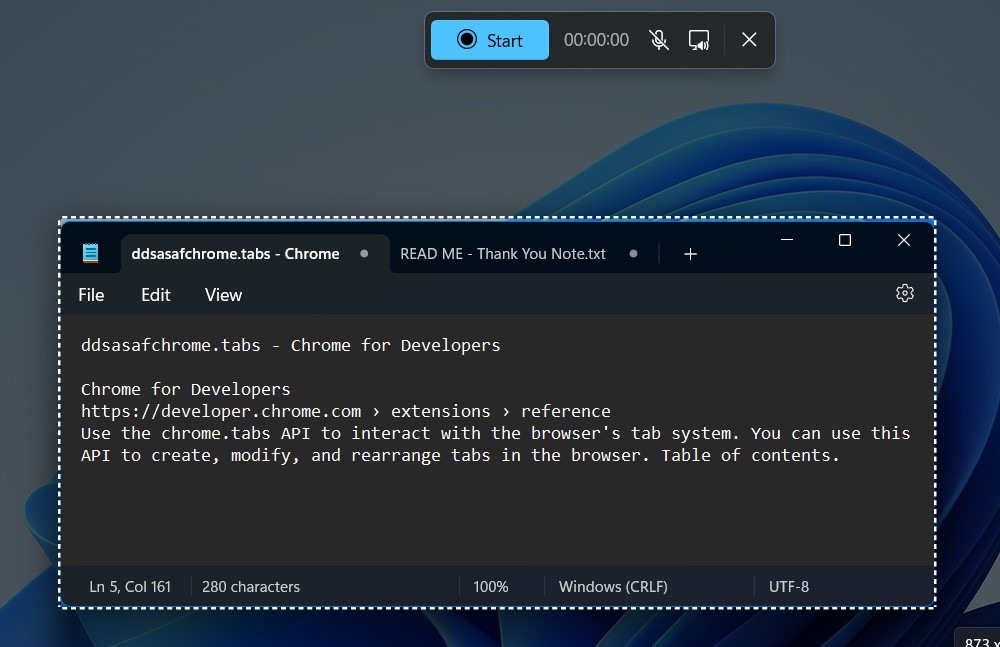
If you he Windows 11, the Snipping Tool has a screen recording option that lets you draw a box around just that portion of the desktop you want to capture. This could be a particular window or, if you're trying to make a tutorial about using the Start Menu, it could be just the area that that menu takes up. However, if your app's window might move around or take up the full screen, you can just draw a box around the entire desktop.
To screen record with Windows 11's Snipping Tool, follow these steps:
1. Launch Snipping Tool. The easiest way to do this is by hitting Windows + Shift + S. This will skip loading the Snipping Tool's main window and take you straight to the part where you can click a button to begin recording.
2. Click the video camera icon to enable screen recording mode (if it's not enabled already).

3. Draw a box around the portion of the screen you wish to capture. If it's the whole screen, draw a box around the entire desktop. If it's a window, draw around that window.
4. Mute or unmute the microphone and system sounds by clicking them. If you want to record yourself talking, obviously keep the mic on.

5. Click the Start recording button.

You'll see a countdown and then the Snipping Tool starts screen recording.
7. Click Stop to stop the recording or Pause to pause it temporarily. I

If you pause it, you can restart the recording by hitting the Play button.

Once you he stopped your screen recording, you will see a preview window where you can play back the video you just created.
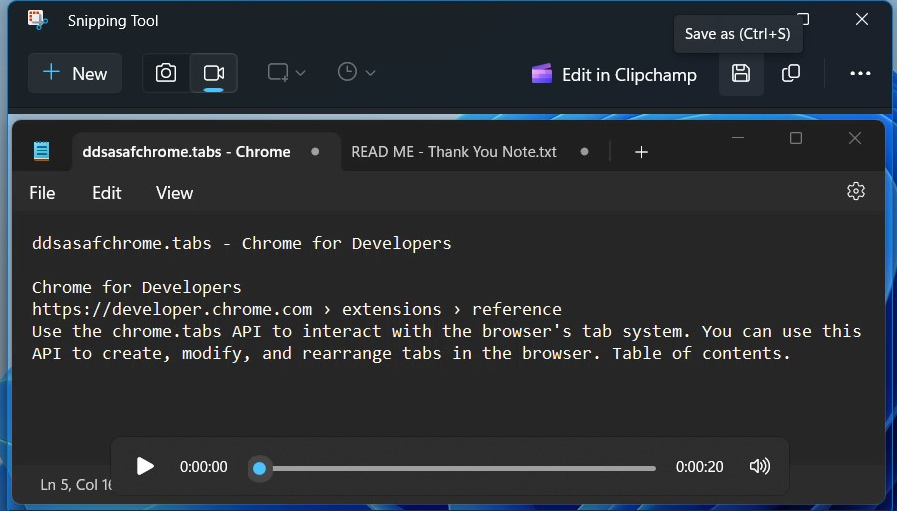
8. Click the Se button or hit CTRL + S to se your screen recording as an MP4 file. That is the only file format it supports.

OBS Studio is very popular in the game streaming community because it's free and great at broadcasting games out to Twitch and other sites. However, you can also use OBS to record the entire screen in Windows 10 or Windows 11 and se it as an MP4 file, without ever streaming what you do.
To screen record Windows with OBS:
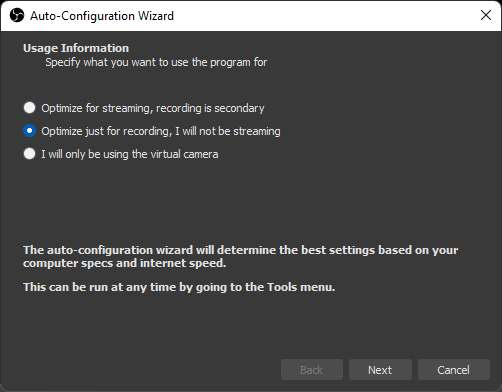
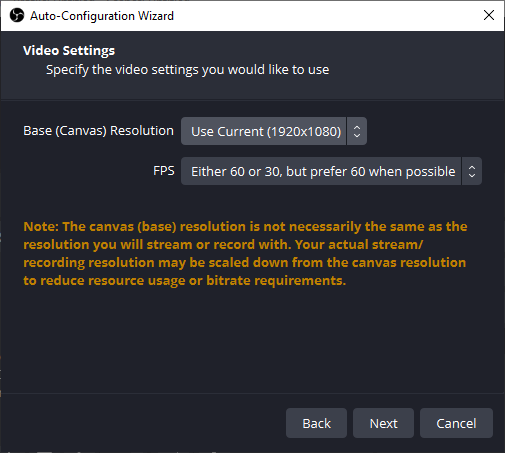
1. Download, install and launch OBS Studio. When you launch OBS for the first time, if you hen't already, you will be asked whether you want to optimize it for streaming or recording only. If you don't plan to stream, choose "Optimize just for recording."
You will also be asked for the base resolution (aka canvas resolution) and frame rate. We recommend choosing the resolution of the screen you plan to capture (it may default to 1080p). If you use a higher resolution screen to capture from than your canvas size, you will not be capturing the full screen.
If, like me, you he a multimonitor set up with different screens of different resolutions, you can always change the canvas size again later.
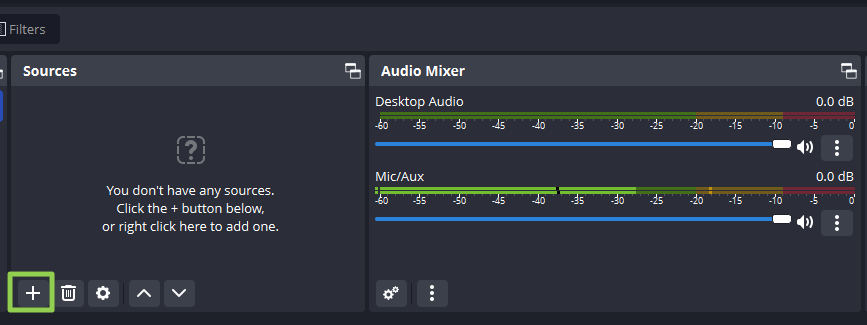
2. Click the Plus icon under Sources to add a new source.
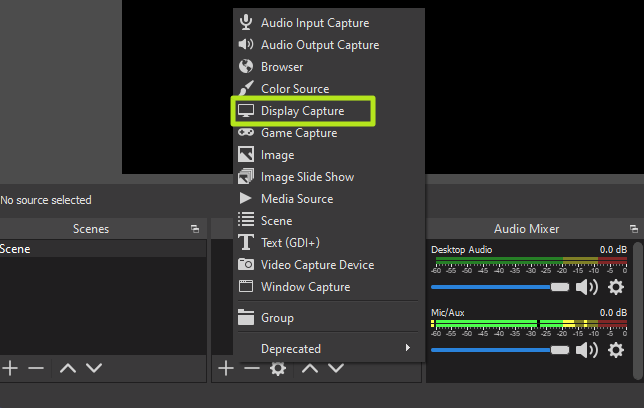
3. Select Display Capture.
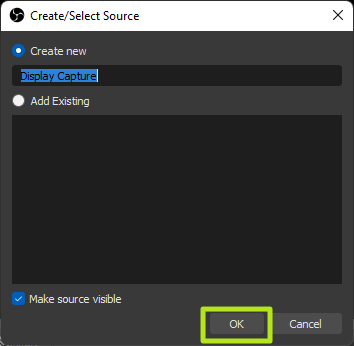
4. Click Ok on the dialog box that pops up. You can give the source a name other than Display Capture if you'd like.
5. Choose a display and click Ok. If you he more than one monitor, this would allow you to he OBS on one screen while recording the activity on another. If you he only one monitor, there's only one choice.
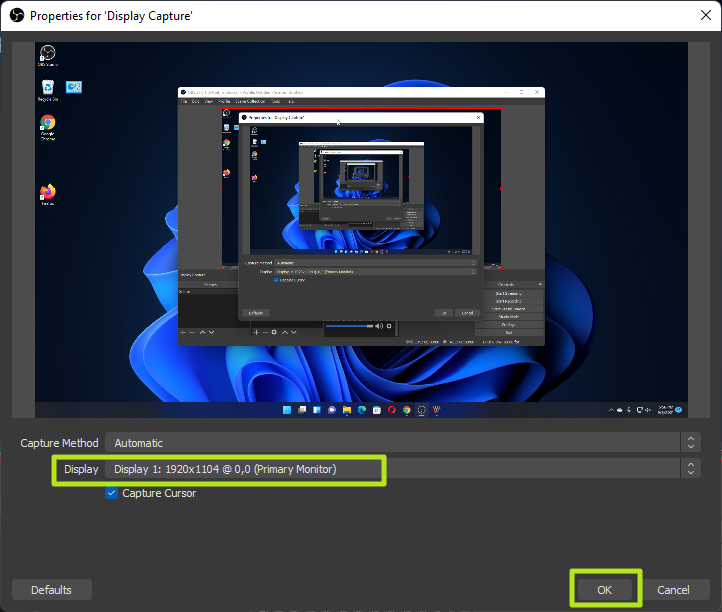
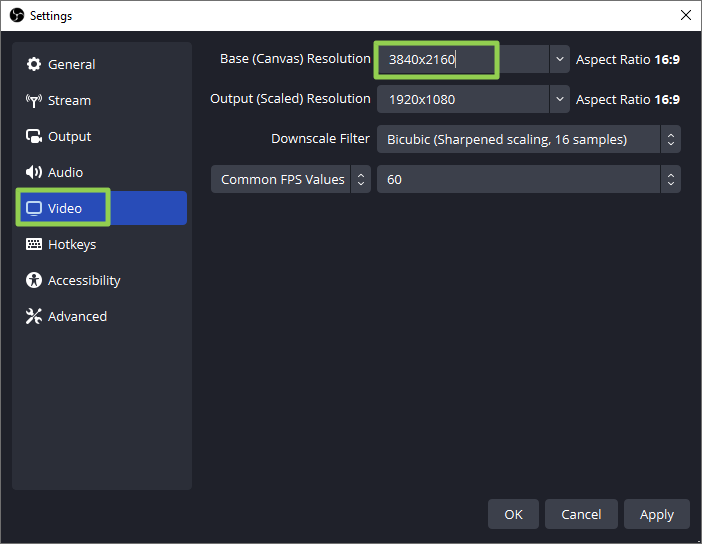
If the display exceeds the bounds of your OBS canvas -- for example, you are capturing a 4K display but you he a 1920 x 1080 base resolution -- your capture will be cut off. Fix the problem, by going to File->Settings->Video and changing the base resolution there. You can also set the output resolution here. If the base resolution is higher than the output (a 1080p output of a 4K screen), OBS will scale the output down but still keep everything in the frame.
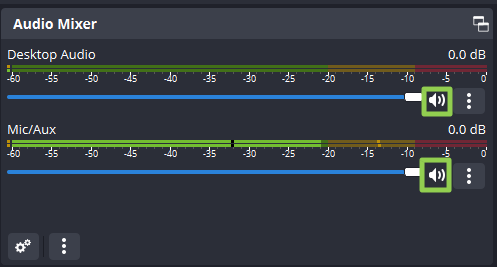
6. Mute the desktop and / or microphone audio if you don't want either or both of those sounds captured. By default, OBS will capture audio from any applications running on your computer and from your default audio input device. To quiet those, you just click on the speaker icons in the audio mixer.
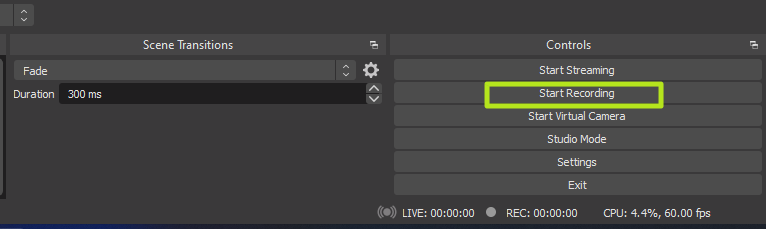
7. Click the Start Recording button in the lower right corner of the screen. Remember that if you didn't mute the microphone or desktop audio, it will record whatever noise you or the computer makes.
8. Minimize OBS if you are screen recording from the same monitor that OBS is on.
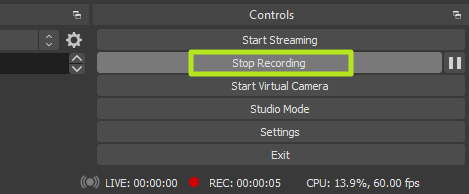
9. Click Stop Recording in OBS when you are finished.
By default, your screen recording videos will be located in the Windows 11 (or 10) Videos folder. They are stored, by default, in the .mkv file format. However, you can change the output to MP4 or MOV files by going to the Settings->Output menu in OBS.