On Windows 11, the computer will lock the system automatically after a period of inactivity to minimize the chances of someone else trying to access your device when you're not near your desk. However, if you're in a secure environment or privacy isn't much of a concern, you can customize the system settings to prevent your computer from locking up automatically.
The settings you he to change will depend on the features you he configured on your computer and how you want to prevent the computer from locking automatically.
You may like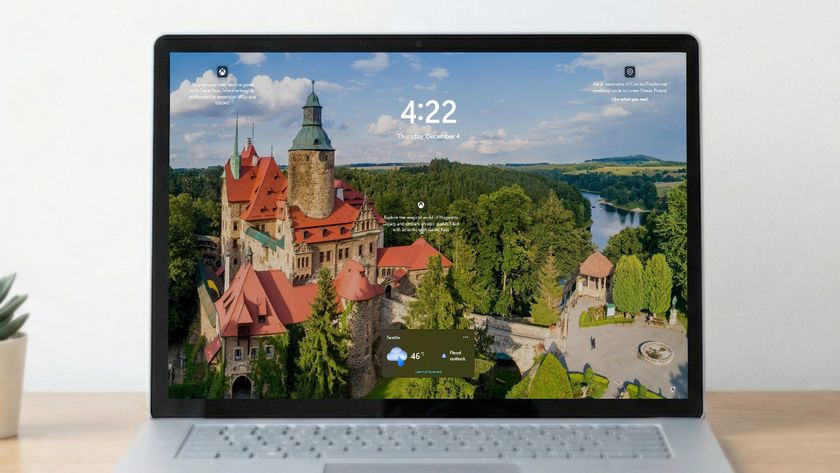 How to show or hide widgets in the Lock Screen of Windows 11
 Windows 11 has Administrator Protection, and here's how to enable it
 Easy steps to upgrade to Windows 11 without a Microsoft account
 Windows 11 tip: master your Start Menu customization
How to stop Windows 11 from locking automatically
Windows 11 tip: master your Start Menu customization
How to stop Windows 11 from locking automaticallyTo control how the operating system locks your computer automatically, you he a number of options. Here's how.
Get the Windows Central NewsletterAll the latest news, reviews, and guides for Windows and Xbox diehards.
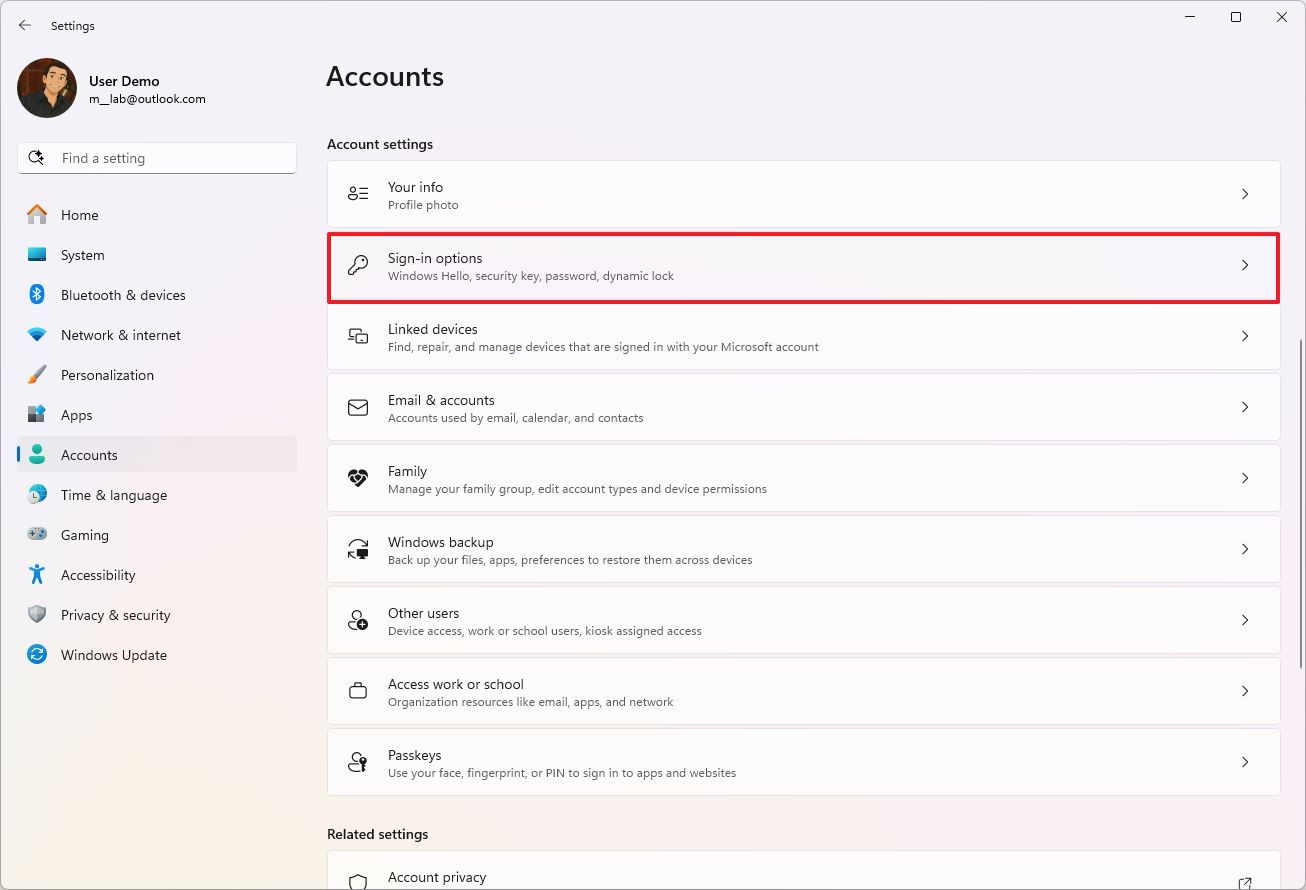
By submitting your information you agree to the Terms & Conditions and Privacy Policy and are aged 16 or over.Adjust sign-in requirementsTo stop the operating system from requiring a password when you he been away, use these steps:
Open Settings.Click on Accounts.Click the Sign-in options page on the right side.
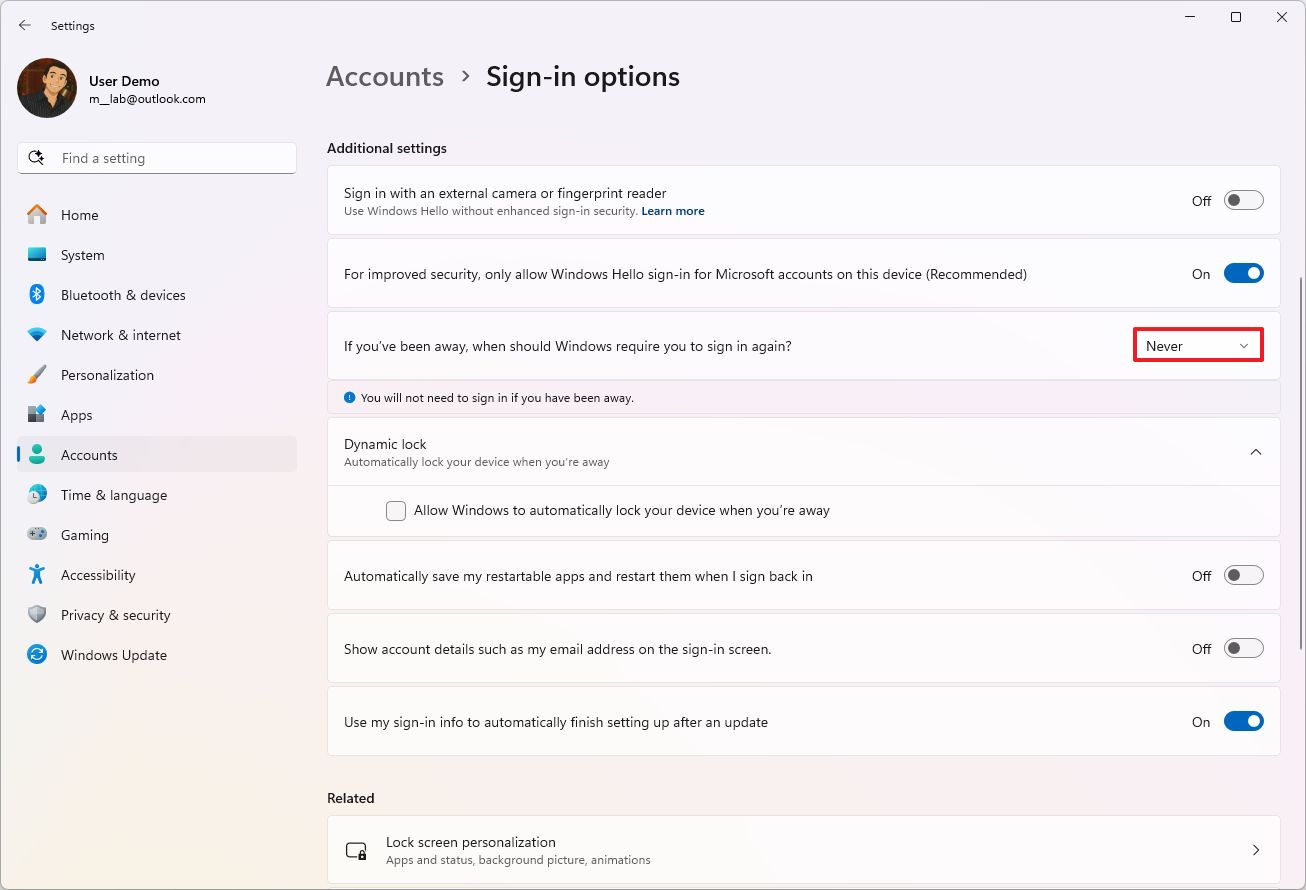
Once you complete the steps, the system won't lock automatically, and on resume, you won't need a password to sign in.
This feature is influenced by Windows Hello, meaning that if you he the fingerprint or face recognition sign-in feature turned on, you won't be able to change this setting.
When turning off this feature, you don't he to change the Power or Presence Sense settings, since resuming from sleep or turning off the screen won't lock your computer.
Disable Dynamic LockThis option will only help if you he the feature configured on your computer.
To disable Dynamic Lock to prevent your device from locking automatically, use these steps:
Open Settings.Click on Accounts.Click the Sign-in options page on the right side.
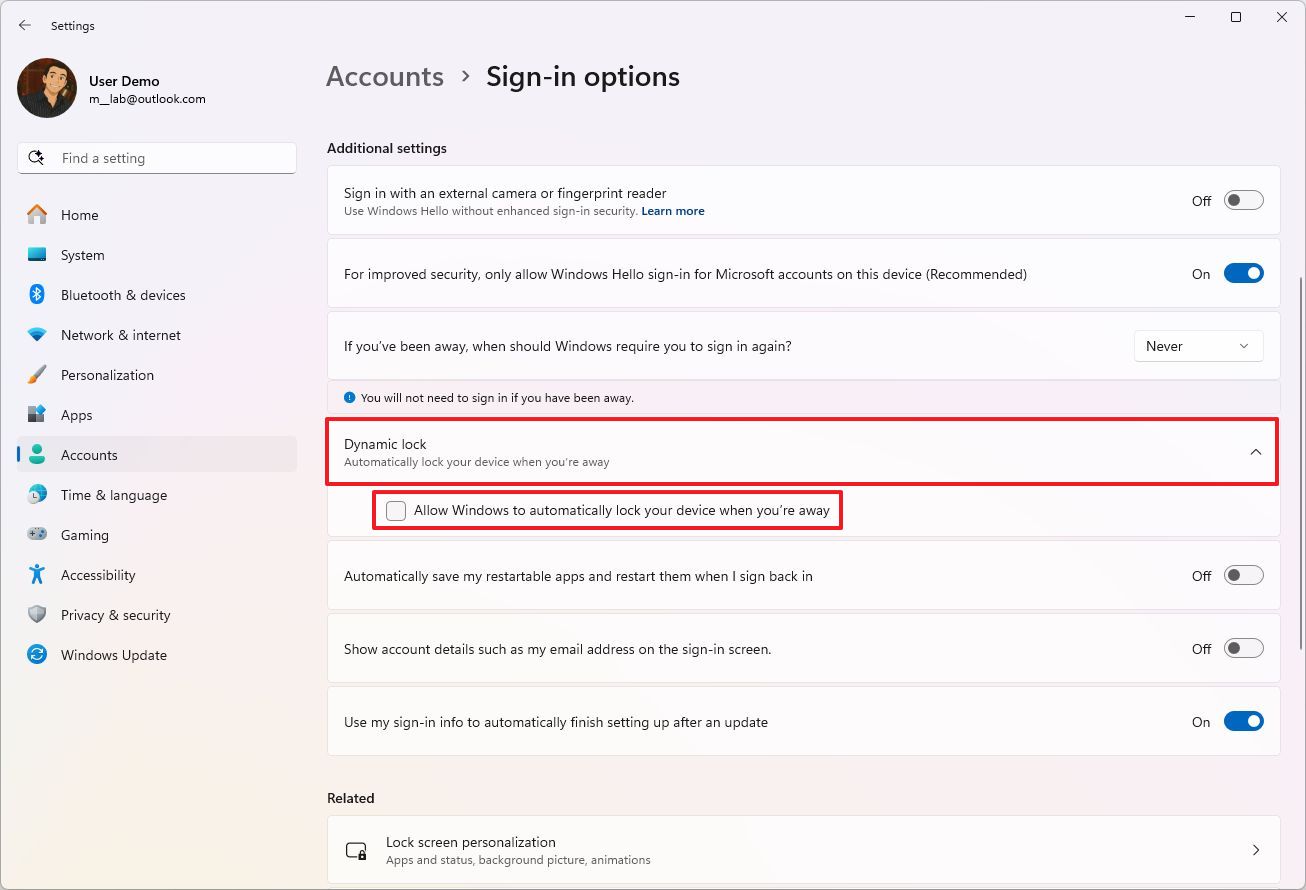
After you complete the steps, when stepping away, Windows 11 should stop locking automatically.
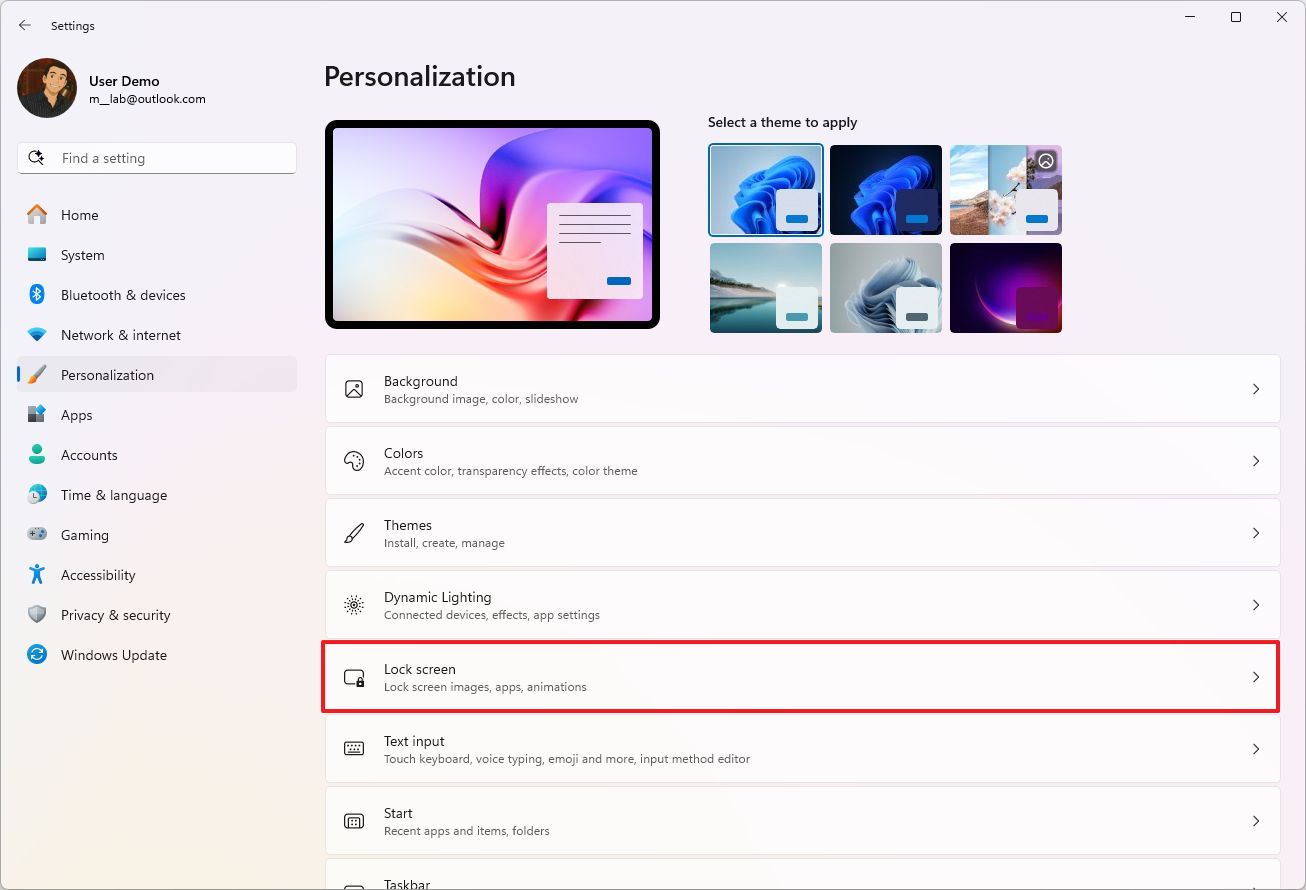
Disable Screen SerTo disable Screen Ser to stop the computer from locking up automatically, use these steps:
Open Settings.Click on Personalization.Click the Lock screen page on the right side.
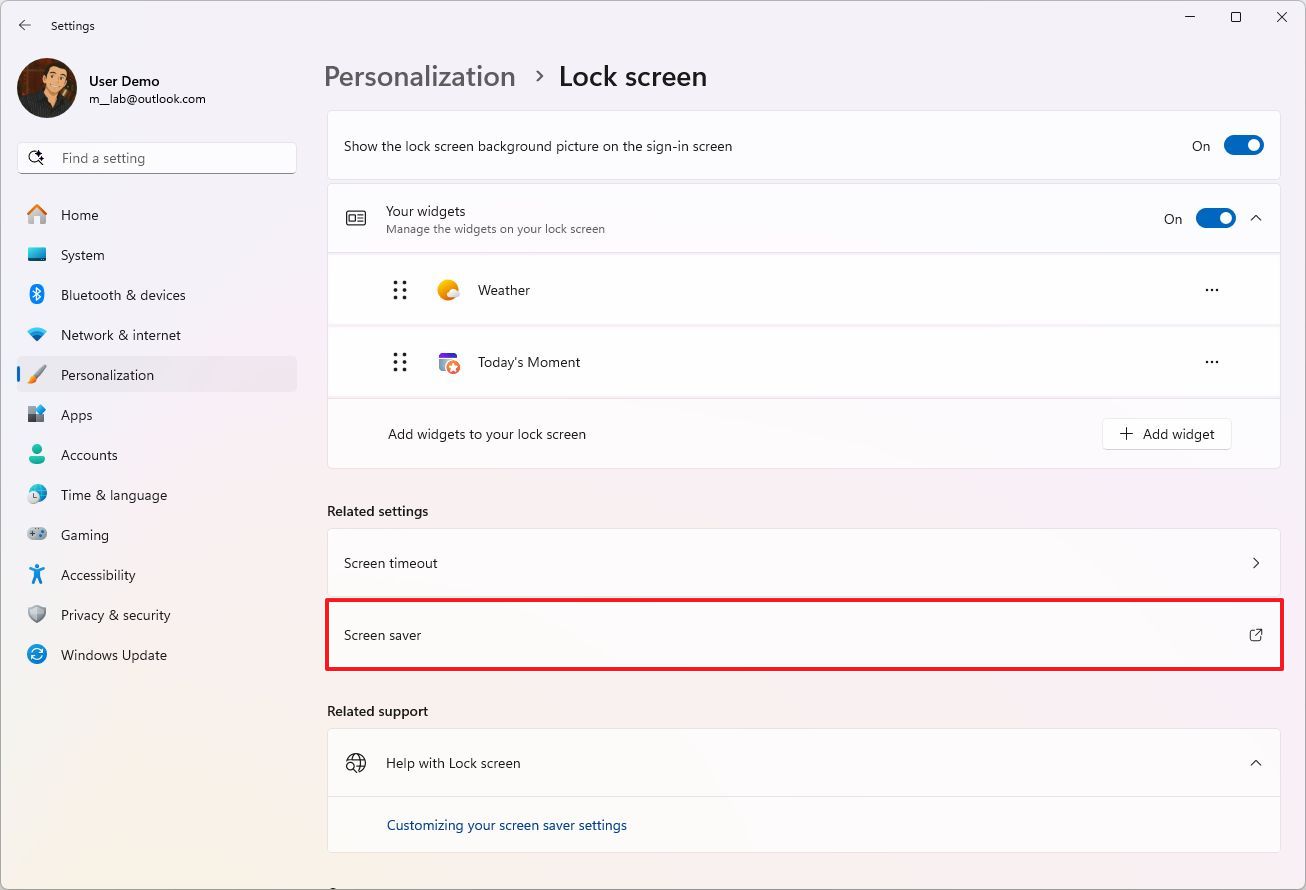
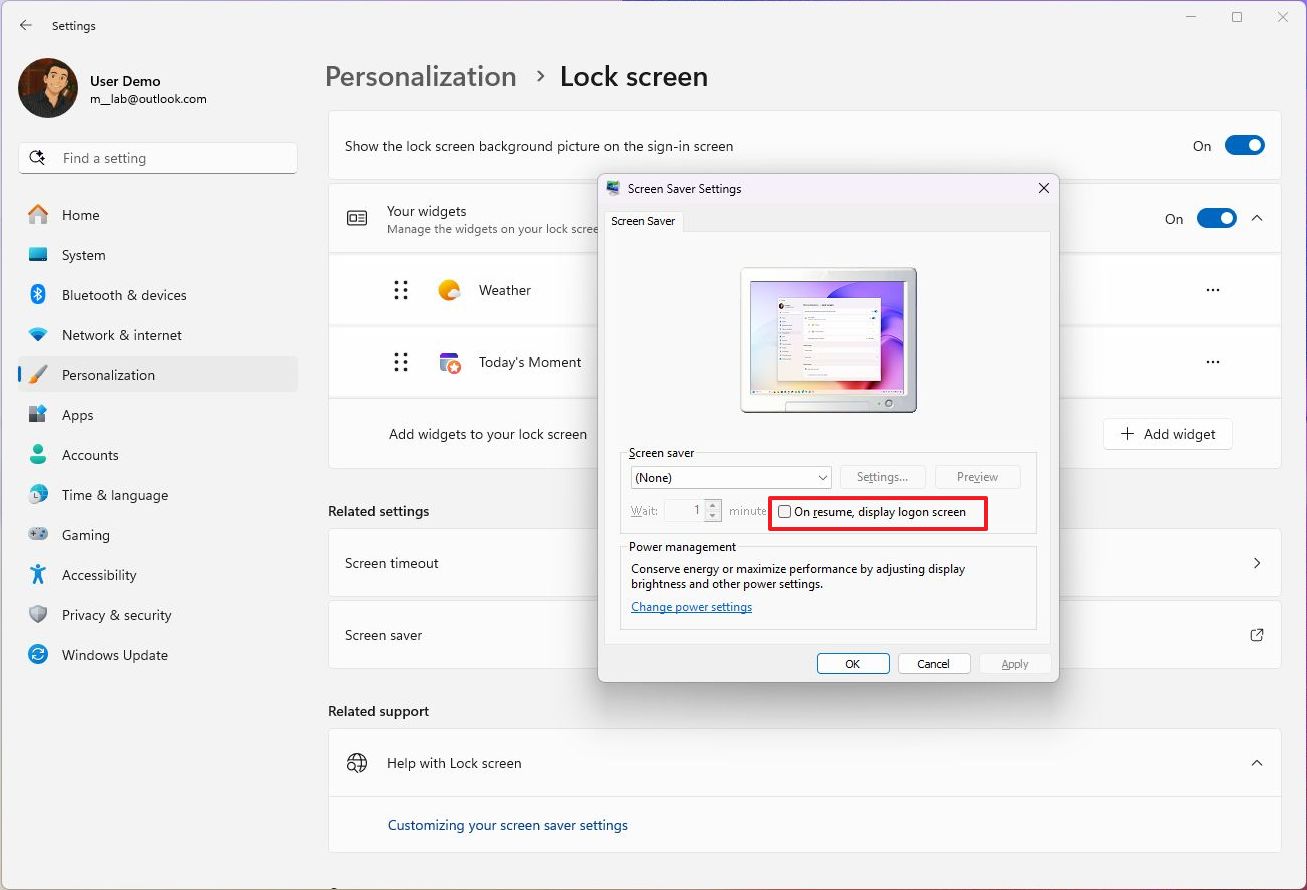
Once you complete the steps, the next time you exit the screen ser, Windows 11 should go directly to the desktop instead of the sign-in screen.
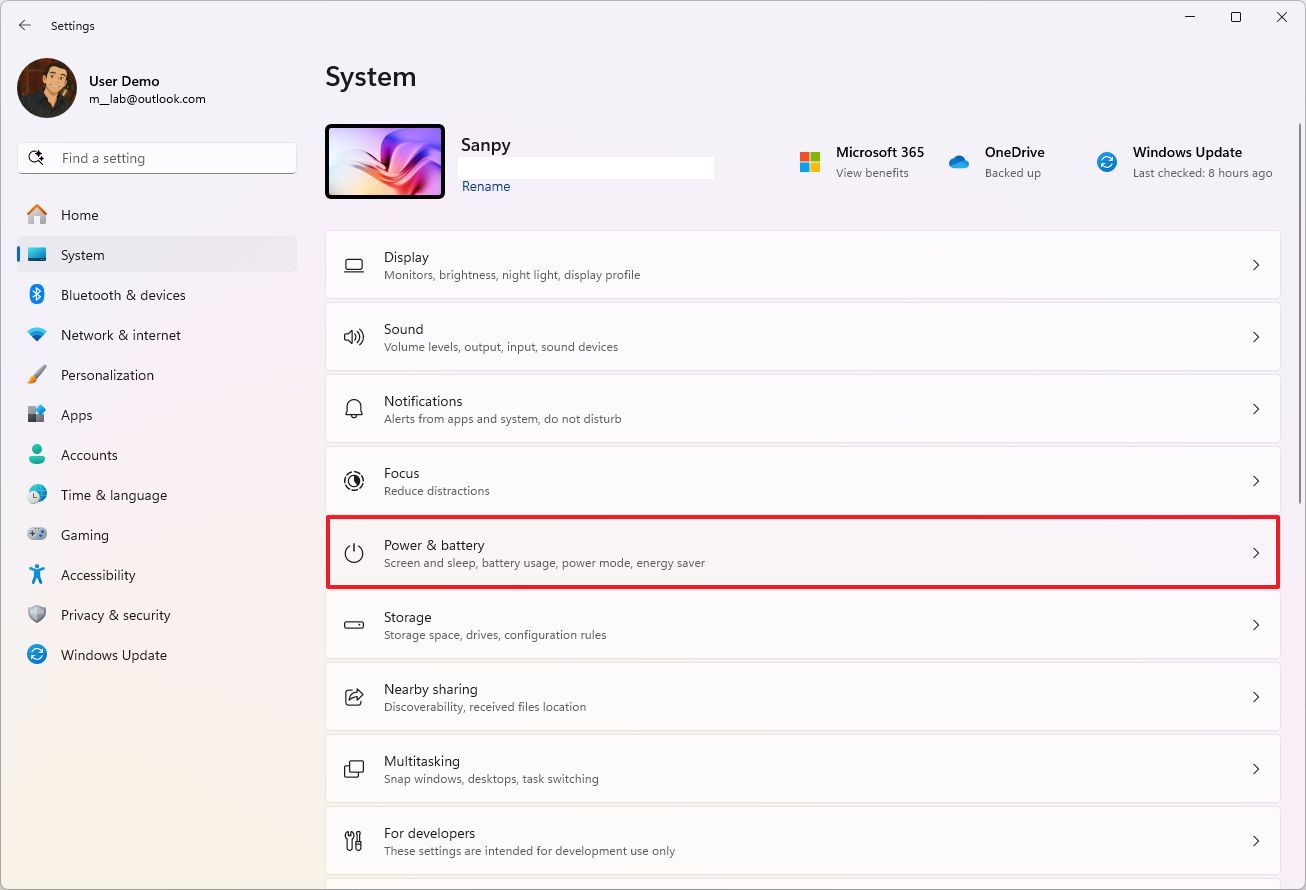
Change power settingsThe power settings won't prevent the computer from locking automatically, but will delay it.
To change the power settings on Windows 11, use these steps:
Open Settings.Click on System.Click the Power & battery (or Power) options page on the right side.
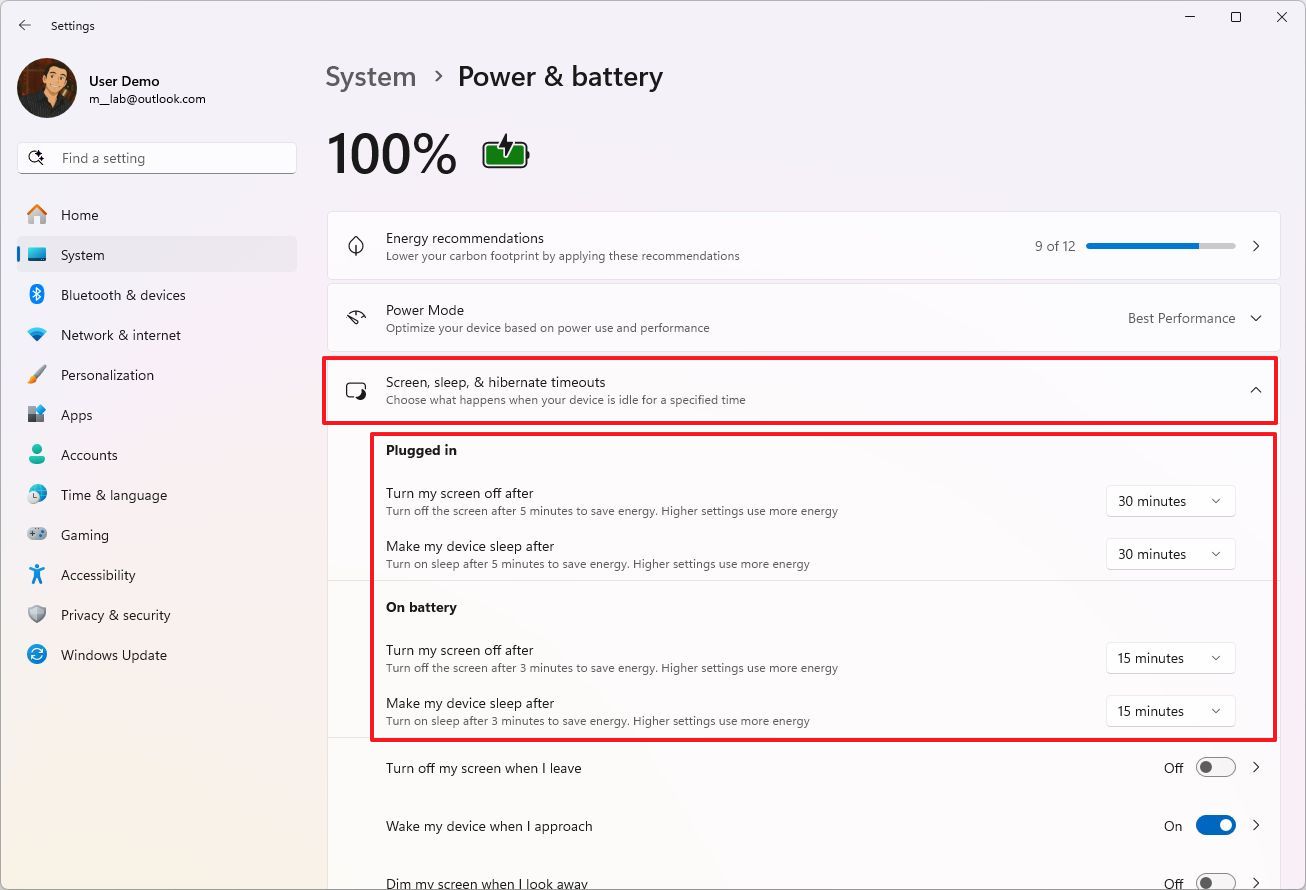
After you complete the steps, your computer will stay unlocked according to your computer.
Change Presence Sense settingsChanging the Presence Sense settings won't stop the computer from locking automatically, but adjusting them can delay it. (These settings will only apply to compatible devices.)
To change the Presence Sense settings on Windows 11, use these steps:
Open Settings.Click on Privacy & security.Click the Presence Sensing page on the right side.
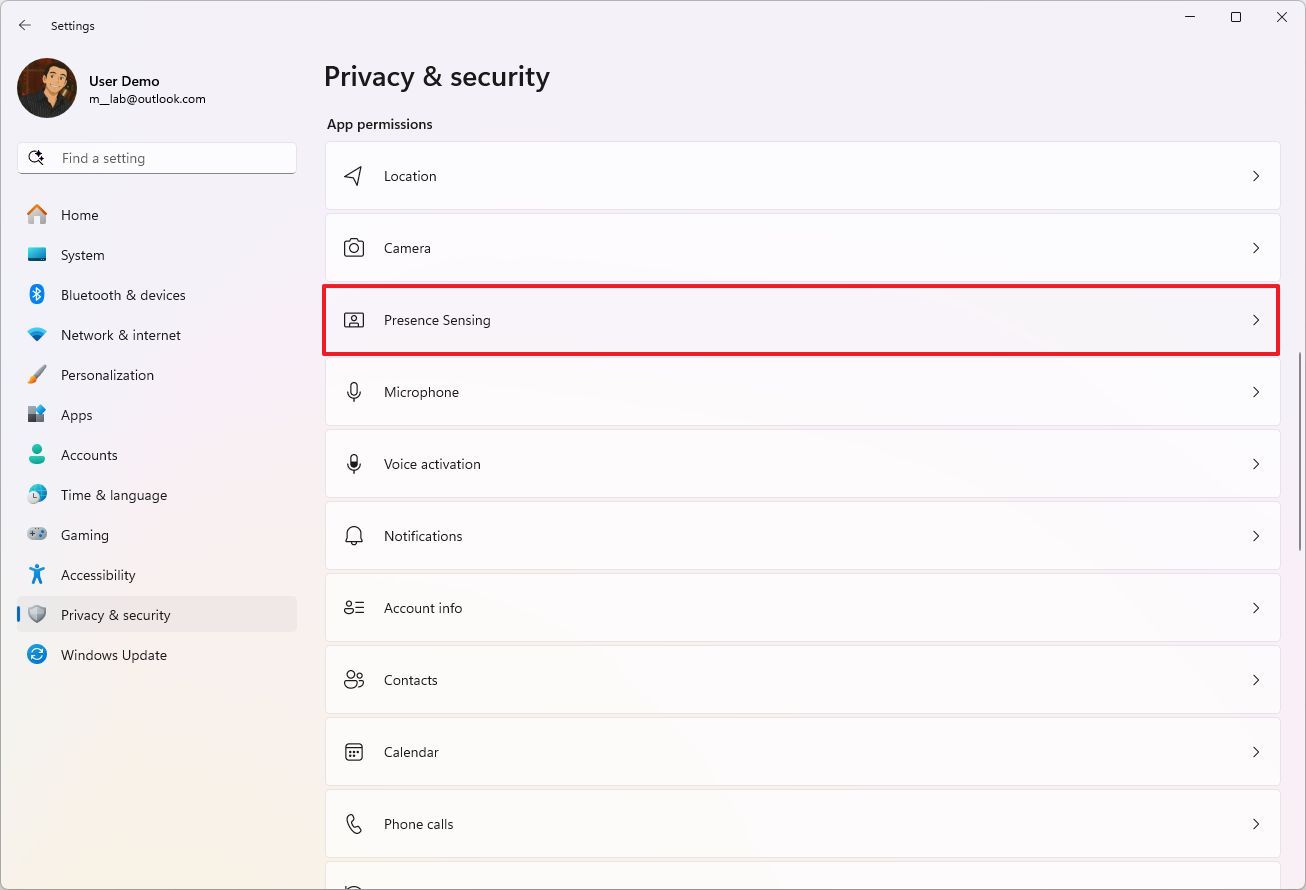
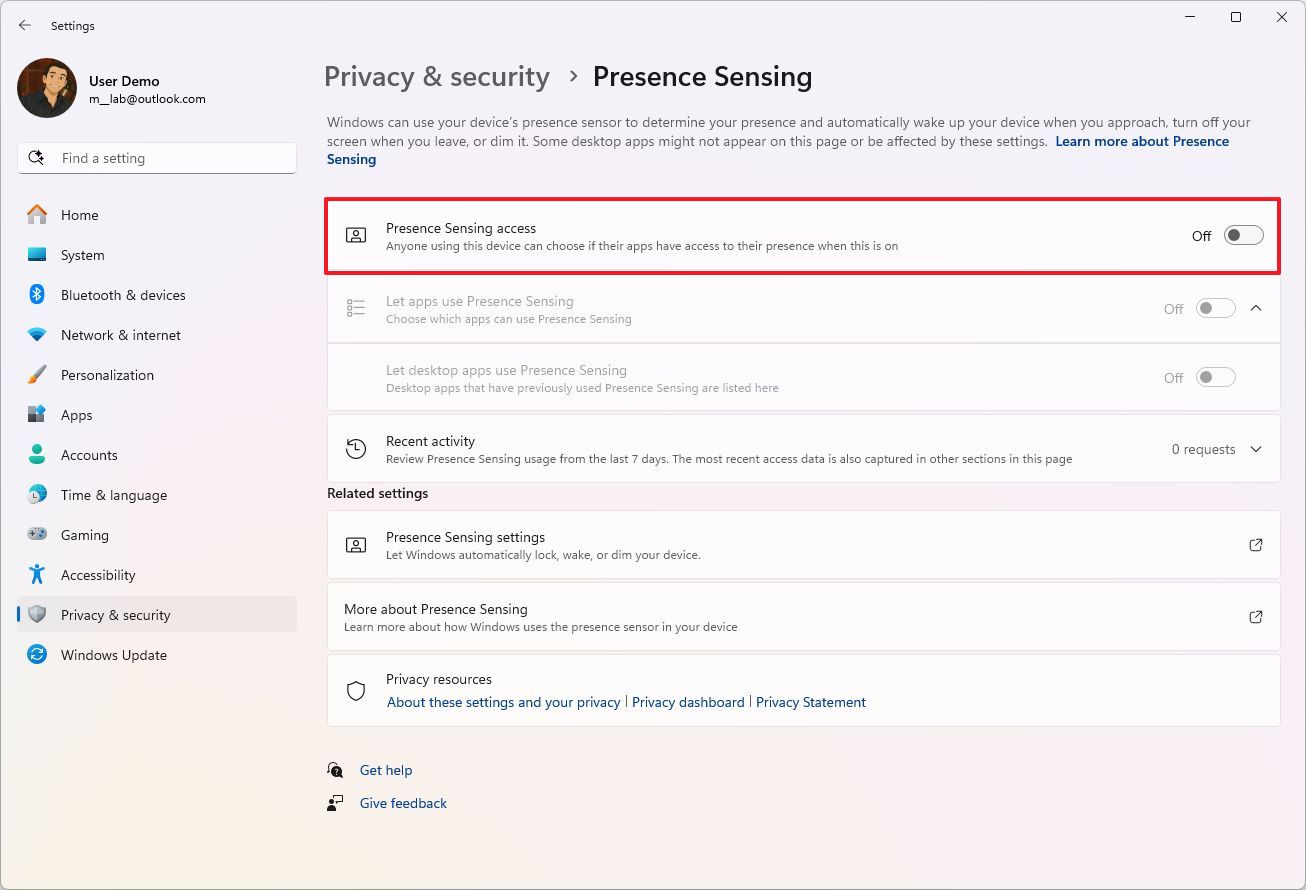
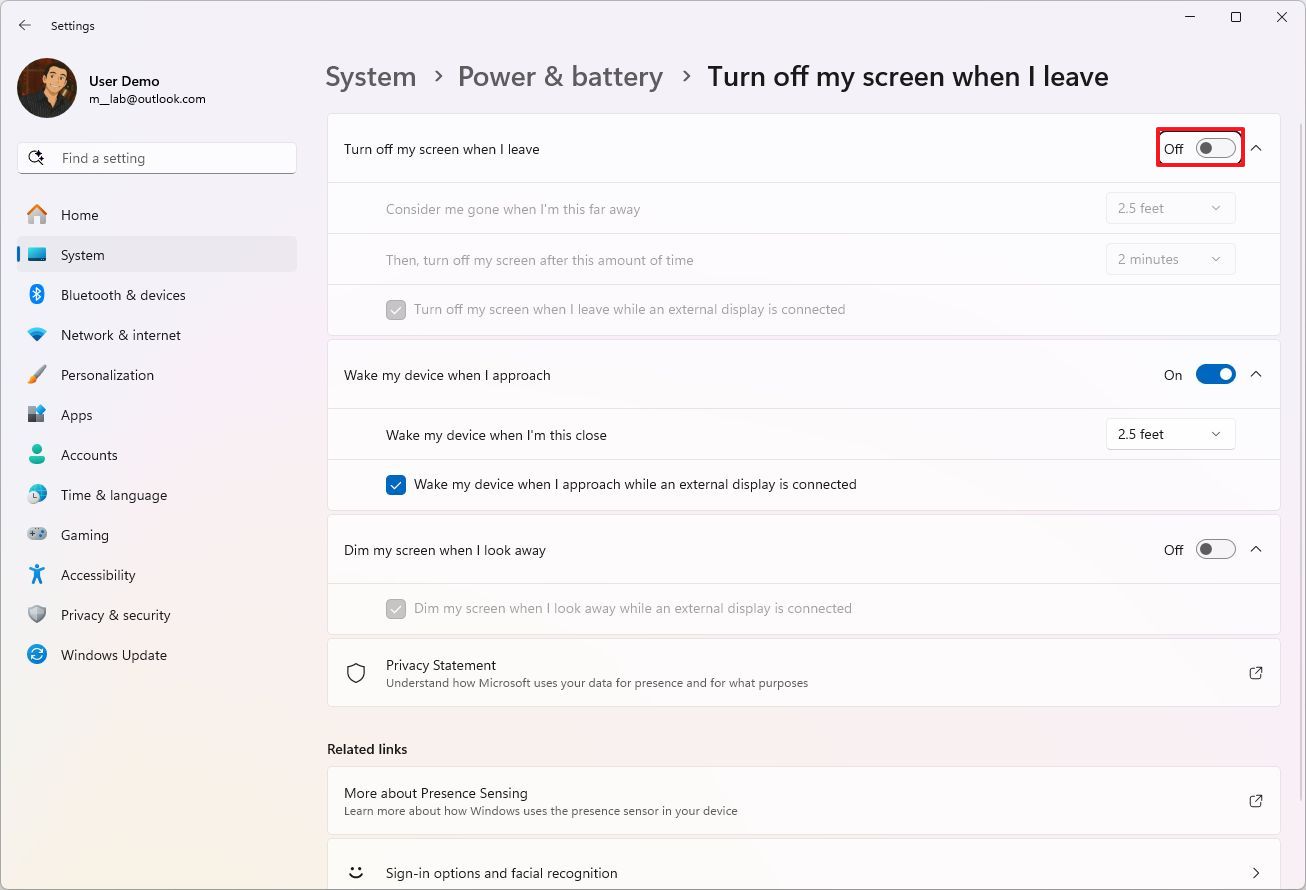
Once you complete the steps, the feature will prevent the devices from turning off the screen and locking the device if you he the "If you've been away, when should Windows require you to sign in again?" option enabled.
More resourcesFind in-depth guides, troubleshooting tips, and the latest updates on Windows 11 and 10 here:
Windows 11 on Windows Central — All you need to knowWindows 10 on Windows Central — All you need to know